EXHAUST
The exhaust that I chose for my Probe is a GReddy. It was $490 from CB Performance. It offers about 2 horsepower more than a Borla exhaust (the other full cat-back exhaust for the Probe). The reason for this is the piping. The stock piping is 2.25". The piping on the GReddy is 2.5". The borla uses 2.25" or smaller. There are two advantages to the borla however. It is completely stainless steel, where only the GReddy’s muffler is stainless steel. The Borla is also much cheaper (under $300). I chose the GReddy because of the small difference in power and I didn’t mind the pipe only being aluminized steel, instead of stainless steel. Many people do not like the look of the GReddy’s big 5" tip. I happen like it more than Borla’s intercooled tips. Others like to keep the stock 'sleeper' look. To me, the GReddy just seems like a better quality exhaust.
What you need:
14mm socket
6" extension for 96-97 cars
WD-40
There are other things you may need, so read the next parts carefully
I recommend that you find a place that will let you use their lift so you can stand under the car. It is much easier to work with the car on a lift because there is more room, and several people can help at the same time. Unfortunately, most people are not as lucky as I am to know someone with a lift. So if you are going to use a jack and jackstands, remember that it won’t be easy. If you are using a jack, click here for instructions.
If you are jacking up the car, remove the right real wheel. This will make it easier to get to the some of the bolts. If you have driven in the winter, chances are that the nuts and bolts next to the right real wheel will be rusted on. My probe is a 1997, and after 3 winters, the nuts and bolts were rusted to hell. They were not coming apart. For some reason ford did not realize that these bolts were right next to wheel. This sped up the rusting process. Make sure you spray some WD-40 on those bolts before you start. They are 14mm nuts. Our first attempt at removing those nuts ended in defeat. We striped them. So we got out a big reciprocating saw and planned on sawing through the pipe just next to the flange. If you must also take this route, make sure you loosen the cat bolts first. This is so you don’t cut your exhaust in half and then find out you can’t get the rest off. To my surprise, the bolts that connect the exhaust to the cat are stainless steel. This didn’t mean they wanted to come off easily though. Nobody could remove those things. So we brought out the air wrench, and after many scary noises and what sounded like a nut being stripped, the thing was off. We repeated the painful procedure and the exhaust was almost off. Now, back to the cutting! Our dilemma was which way to cut. There was a brake line on one side, and the gas tank on the other. (Remember, during normal driving the extremely hot exhaust pipe is about 1" from either of these things) We decided it was better to cut towards the gas tank, since it had a metal heat shield. After hours of trying to get the bolts loose, the exhaust was cut in two pieces in less than 30 seconds. Our next challenge was removing the exhaust from the rubber hangers. Not as easy as it sounds. We spent about half an hour doing this. We sprayed most of our WD-40 onto all of the rubber hangers (this helped a lot). We stuck a long screwdriver through the hangers, and forced the exhaust out. I grabbed both pieces and I happily threw them away!
The 6" extension and gaskets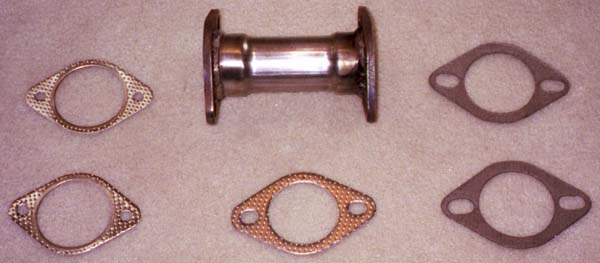 |
A better view of the extension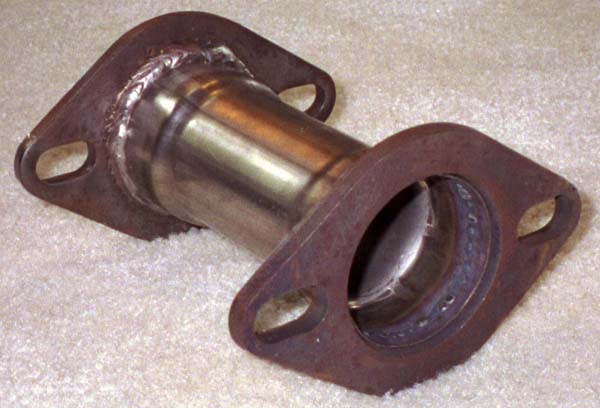 |
This is where we cut the exhaust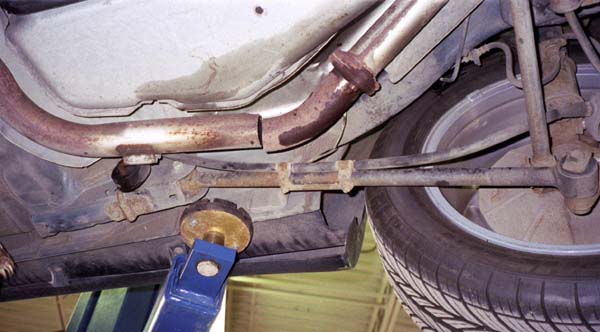 |
Now comes the easy part, putting the new exhaust on. If you have 1996-1997, you will need a 6" extension pipe that goes between the cat and the exhaust. It does not have to be exactly 6 inches, but a little less than 6 inches is perfect. You could also get the extension welded into the new exhaust itself. Of course that would be more expensive. I chose to get an extension with flanged ends. This enables me to remove the extension later if I get headers made for the 1993-1995 probes. Make sure you have new gaskets because the old one will look rusty and fall apart. I bought stainless steel nuts, bolts and lock washers so if I ever wanted the exhaust to come off, it wouldn’t be a problem. We bolted on the extension to the cat. Next came the first section of the exhaust. Putting the hangers back in was much easier than taking them out. Finally, the last section with the muffler. This bolts up to the first section of the exhaust near the right rear wheel. The GReddy came with foam around the muffler and tip to protect it. Keep this foam on while you are installing it, so you don’t scratch the muffler or the car. We put the final hangers in and we were done!
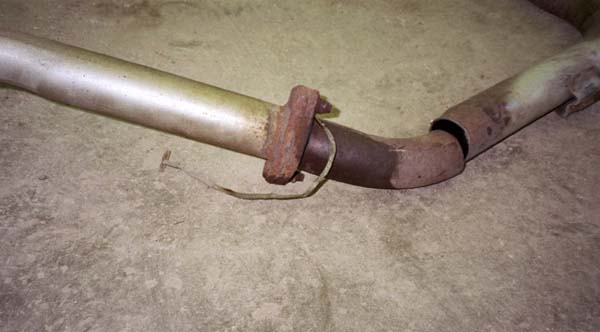
Here is a picture of the ground wire that is supposed to
stop rust. Notice the large amounts of rust on the flange |
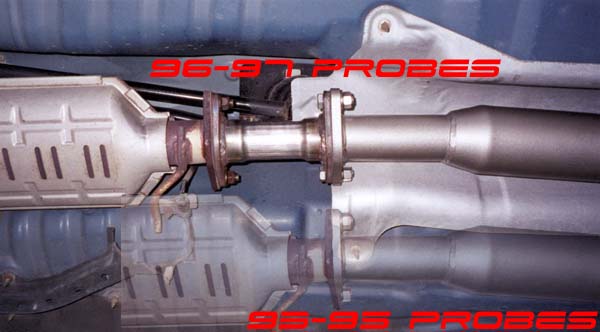
This picture shows the difference between the 93-95
probes and the 96-97 probes |
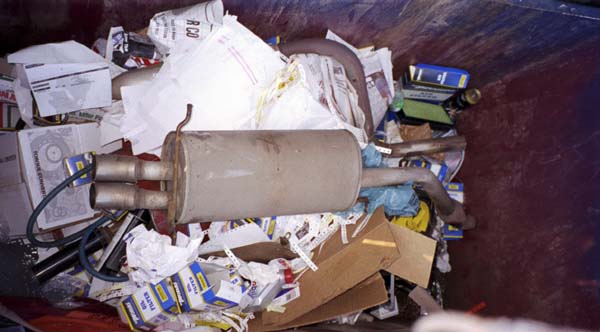
The stock exhaust where it belongs |
This picture shows the path of the piping

Don’t expect the sound to be great right after you put it on. It can take months for an exhaust to come to it’s full potential. If you drive for longer than 30 minutes often, it will break in quicker. Trust me, at 5,000 RPMs in 2nd gear or higher, this exhaust sounds great. It also idles very quietly. In normal daily driving, (<3,000 RPMs) the sound is nothing special. But when you hit five grand, well, you’ll understand. This exhaust is not very loud at highway speeds either. At cruising speeds, it is barely noticeable.
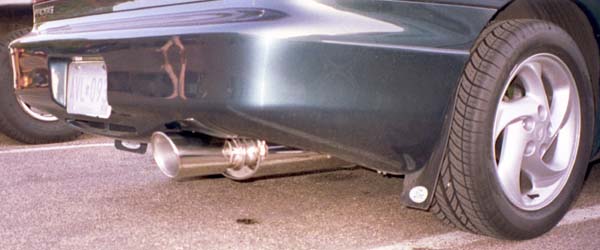
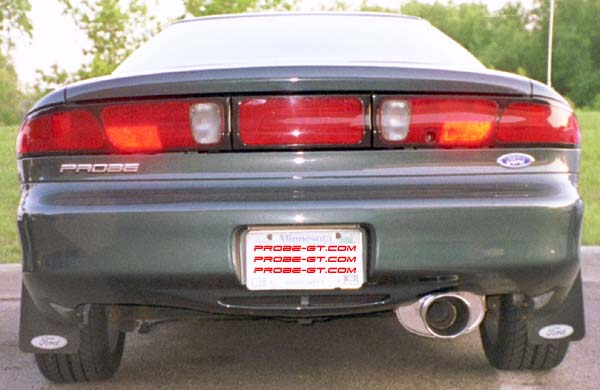
A side view |
This is what everyone sees |
Procedure:
1. Raise the car by jacking or a lift.
2. If you are jacking up the car, remove the right rear wheel.
3. Spray WD-40 on all exhaust nuts and hangers.
4. Remove the nuts and bolts near the right rear wheel. They are 14mm. If you can’t remove them, skip this step.
5. Remove the nuts holding the exhaust onto the cat.
6. If you were unable to remove the nuts and bolts near the right rear wheel, cut the exhaust near that flange.
7. Remove the exhaust pieces from the hangers.
8. Bolt the 6" extension on if you have a 1996-1997 Probe.
9. Bolt on the first section of pipe and put the hangers in.
10. With the foam still on the muffler and tip, bolt that section to the first section.
11. Start the car up and make sure there are no leaks.